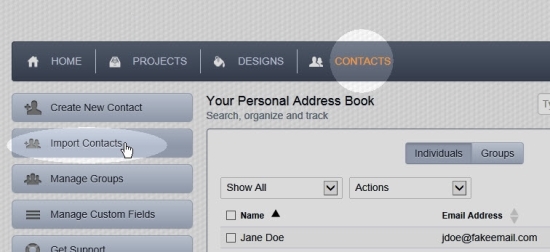
To import contacts into your address book:
- Click on Contacts in the main menu.
- Click on the Import Contacts button in the left column of the page.
Note:
Please click here for instructions on importing contacts from a file stored in your Dropbox account.
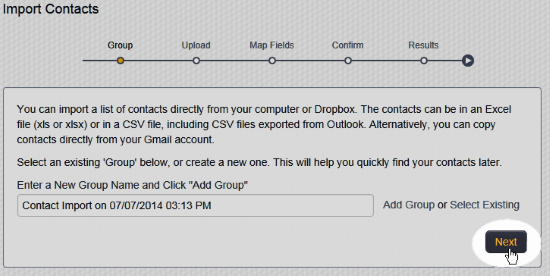
Please click here for instructions on importing contacts from Gmail. - Enter a new group name and click Add Group, or click Select Existing and select an existing group name from the resulting menu.
- Click the Next button:
- Drag and drop a contacts file (.csv, .xls or .xlsx) onto "Excel or CSV file on My Computer", or click the icon to locate and select the file on your computer for upload:

- See the column-matching screen once the file is uploaded.
- Map the imported columns to the correct part of the address book. For columns labeled "Skip Column" change the label to represent the data in that column:
- For example if you see first names in the first column, change "Skip Column" to "First Name." Do this for each column. Leave the menu set to "Skip Column" for any column which you do not wish to import/use.
- If the menu does not have a matching entry for a column, you can create a custom field for that column later. Note: You must map at least one column. The email address is a good choice if you want to match only one column.
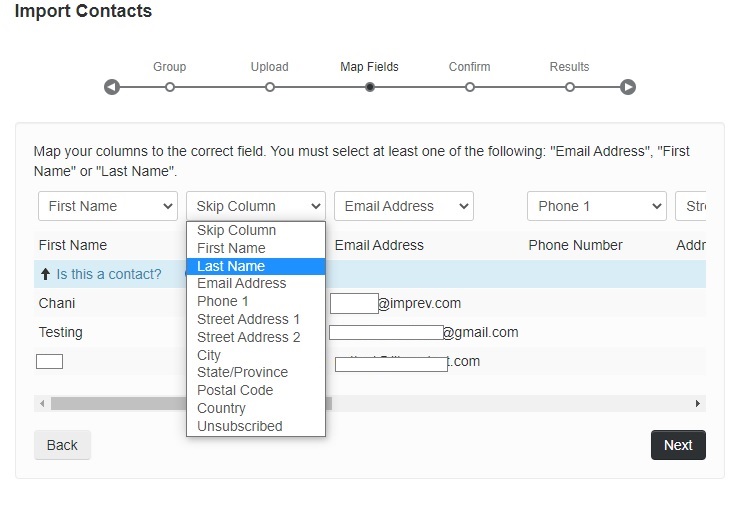
Use the horizontal scrollbar, below the list, to scroll to the right to make a choice for each column.
- Finish mapping columns as described above, then click the Next button in the lower-right.
- Click the Next button to proceed after viewing a summary of the import to take place.
There may be a pause while the addresses are imported. When the import is done you are shown a summary of the import. Click the Done button to view the group you imported the new contacts into.
Comments
0 comments
Please sign in to leave a comment.