Upload
To upload a postal indicia:
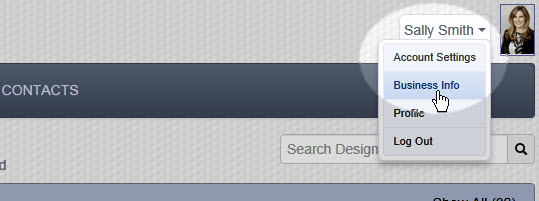
- Click on your name in the upper-right of the page.
- Choose Business Info in the resulting menu.
- Use Click to Upload in the upper-right of the Business Info page, under "Postal Indicia".
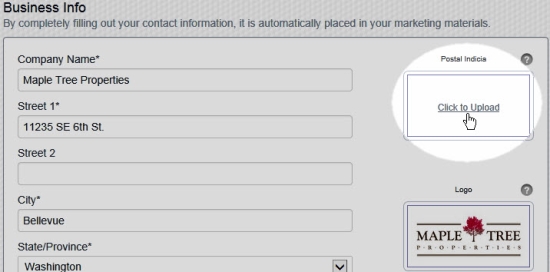
- Locate and select your Postal Indicia file on your computer, then click the Open Button. Your Postal Indicia image uploads.
Crop
If the image is outlined in red and shows an exclamation point within a yellow triangle, you need to crop the image:
-
- Hover your mouse cursor over the image, then click on the crop icon that appears over the lower part of the image.
- Click and drag the edges of the cropping box (dotted lines) to resize the cropping box. Click and drag in the center of the cropping box to reposition it.
- Click the Crop button and then click the Save button (lower-right).

- Hover your mouse cursor over the image, then click on the crop icon that appears over the lower part of the image.
The postal indicia will now be automatically included when you create projects using mailable design templates (e.g. postcards).
Note: You may also follow the steps above to replace an existing postal indicia.
Comments
0 comments
Please sign in to leave a comment.