To start creating a new project after logging in to the Marketing Center:
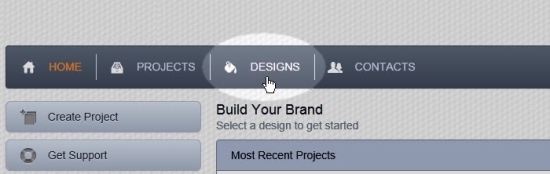
- Click on Designs just to the left of center at the top of any page.
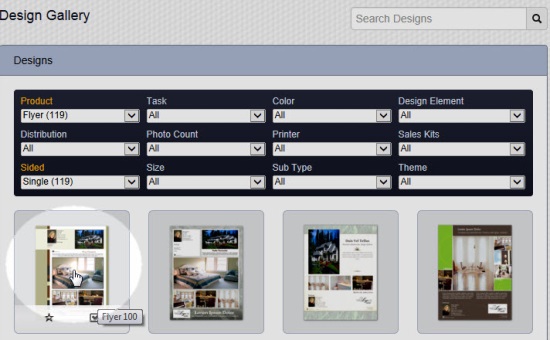
- Search or browse to choose a design template.
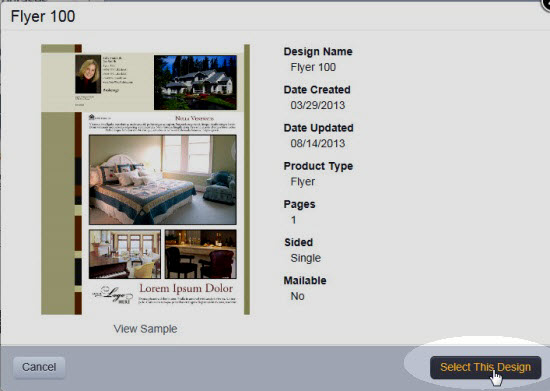
- Select the design template you want by clicking on the thumbnail image to view a larger image and details about the design:
- Click the Select This Design button to start editing the design template:
Note: You could also hover your mouse cursor over the thumbnail image, then click the check-marked box that appears over the bottom part of the thumbnail image to select the design.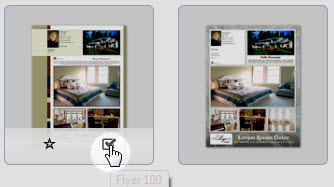
- Enter a name for the project in the field labeled Project Name (e.g. "Flyer for 1234 Main St.").
Optional: Enter a description in the field labeled "Project Description". This description is seen only by you and not included in project. - Click on Select a Folder, within the area labeled Project Folder, to create a new folder or to select an existing folder to store the project in.
- Select to include or remove the EHO logo. If you do not want the EHO logo displayed in the project (e.g. the project is not intended to promote a property for sale) uncheck the box labeled "Yes, include the Equal Housing Opportunity (EHO) logo in this project." Please click here for more information about the EHO logo on projects.
- Decide to uncheck the box labeled "Automatically crop photos when adding or rearranging.", if you do not want the photos in the project automatically cropped or leave it checked. Note: This option is not displayed for all project types as some project types do not require image cropping.
- Click Save and Continue to create the project and start editing it.

This short video shows the steps outlined above:
Comments
0 comments
Please sign in to leave a comment.