Question:
Why does my photo look distorted, pixelated, or lossy?
Answer:
The most common causes of images appearing distorted after upload are:
- The image uploaded is a low quality image, or is a high quality image but the width and height are too small for quality results. We recommend images with at least 75dpi (dots per inch) for multimedia designs, and at least 150dpi for print designs, for the size of the image within the design.
There is no specific one-size-fits-all photo size requirement (the size of images in our templates varies from template to template, and photo to photo), but images with at least 1800 pixels on the longest side should be sufficient to avoid invoking the quality alert in most of our templates.
Images from most digital cameras can be uploaded without first reducing them in photo editing software. If you've uploaded a small version of an image, but have a larger version of the image available, try uploading the larger version of the image instead.
Note: Using photo editing software to enlarge a small image will degrade the quality of the image, not improve it. You'll need an original large image. - The image has not yet been cropped, so the image is not the correct dimensions for its place in the template, causing the image to be stretched or squished when previewing or publishing the project. Images that need to be cropped will be displayed with a red dotted line outlining the image slot, and below the thumbnail of the image, the crop button will be red.
To learn how to turn on automatic cropping of images in an existing project, please see "How can enable or disable the automatic cropping of images?"
To crop an image which has already been uploaded, after logging in to the Marketing Center:
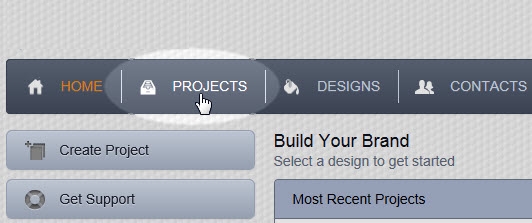
1. On the main menu at the top of any page, select Projects (see below).
2. Choose the folder which contains the project you want to edit.
3. Select the project you want to edit. Hover your mouse cursor over a project to get a better look at the project name.
3. Near the right side of the page, select the Edit button.
4. On the progress bar, choose Photos (se below).
5. Uncropped images have the thumbnail (small version of the image) outlined in red, and below the thumbnail of the image, the crop button is red. To launch the cropping tool, select the thumbnail of the image or the Crop icon that appears below the thumbnail (see below).
6. Click and drag the corners of the cropping area (dotted line) to resize the cropping area (see below).
7. Click and drag in the center of the cropping area to reposition the cropping area (see below).
8. Select the Crop button to save your cropping (see below).
9. When you've finished cropping images, select Save and Continue to save all your changes.
Note: When rearranging photos, they'll automatically be recropped as you move them, if the option to automatically crop is enabled. You may need to recrop an image after moving it, if the option to automatically crop is disabled.
Comments
0 comments
Please sign in to leave a comment.