Add new agents or brokerage employees, manage their roles, and determine which products they can access.
- From the Manage Company screen, click on the Plus icon (see below).

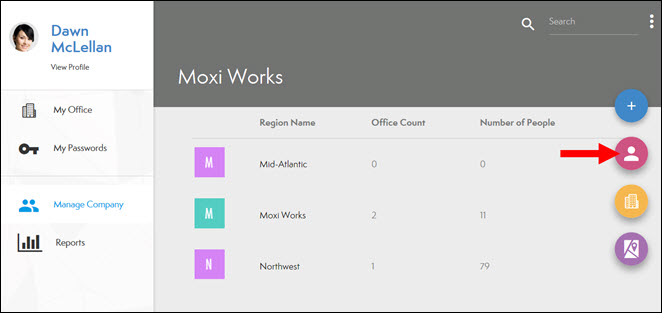
- Select the People icon (see below)
- Select the Region and Office where this person is located, and click Next (see below).

- Page one - Main Info:
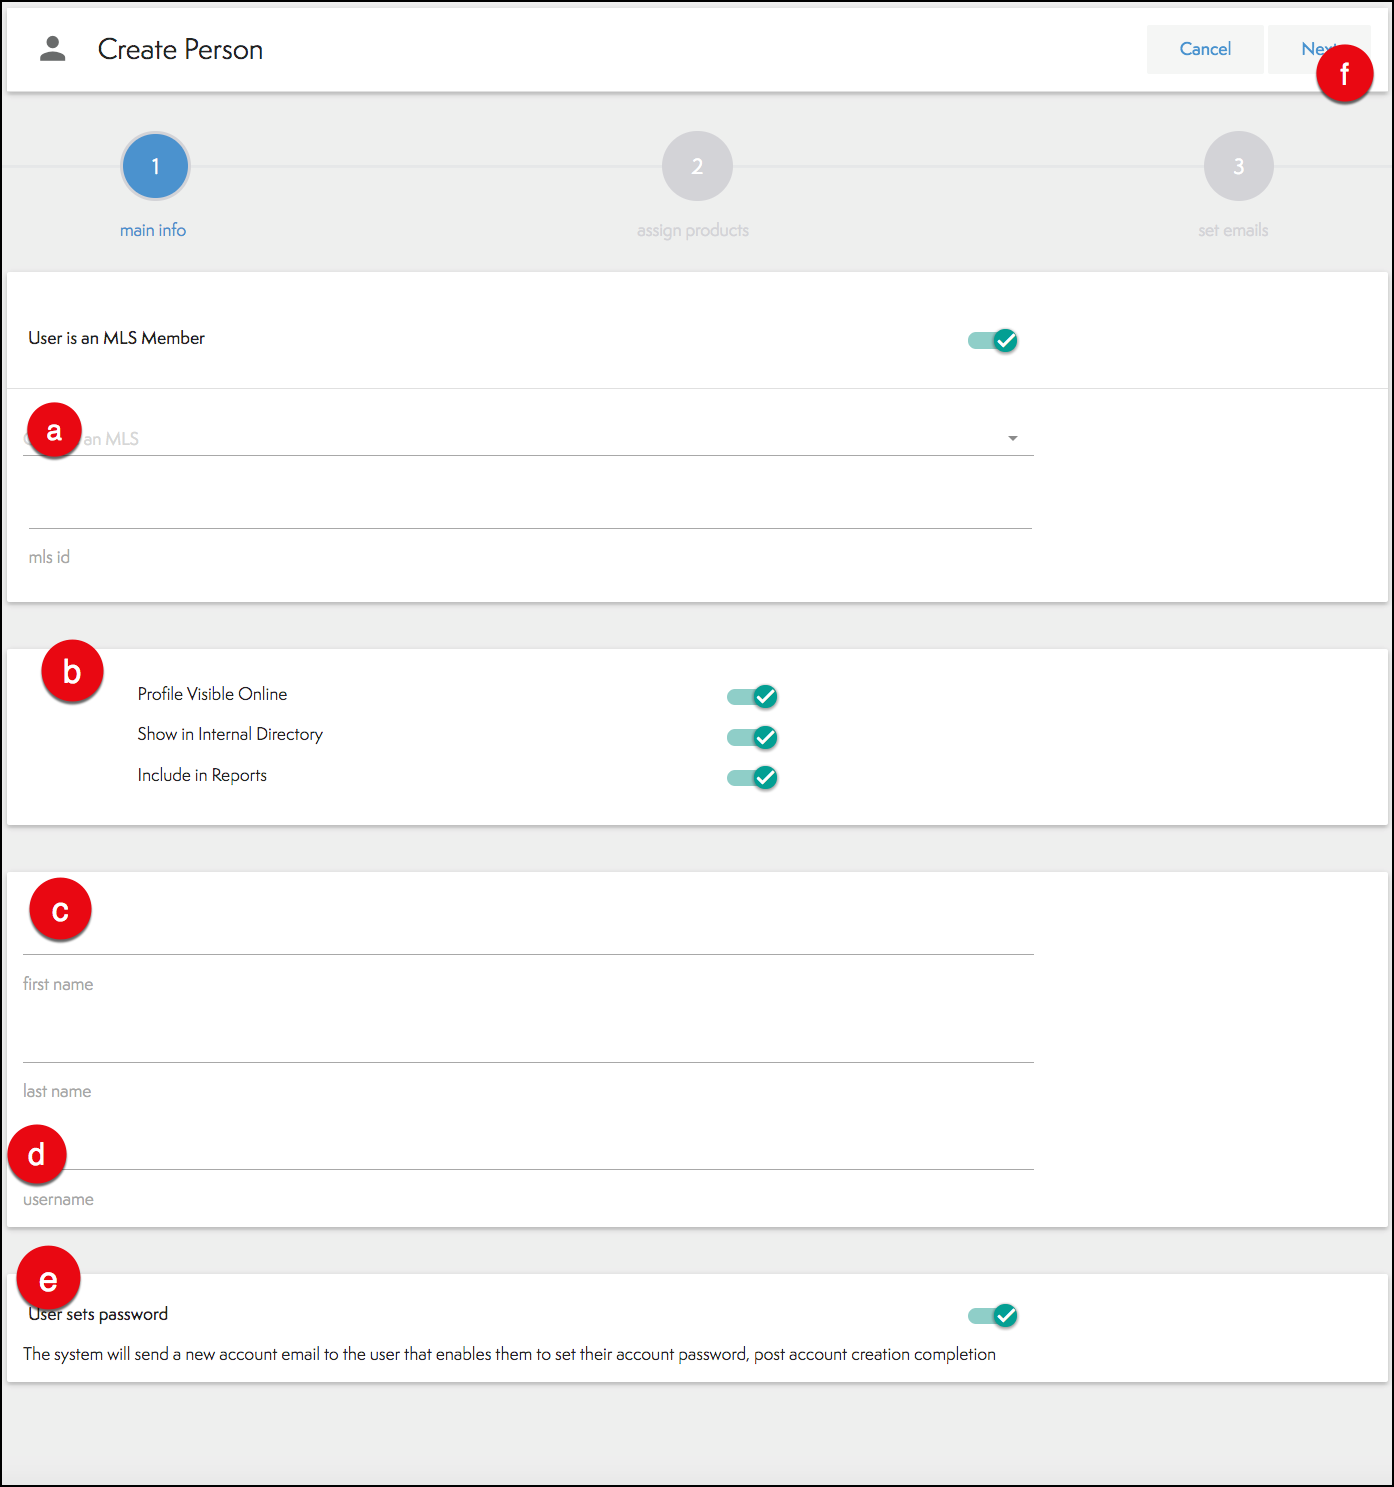
- Choose the MLS from the drop-down menu and enter the agent’s MLS ID.
- Select if this person is ready to be visible online and in the Directory.
- Include the agent’s first and last name.
- Create a username.
- Create a password.
- If the toggle switch is green, the system will send the agent an email to set their own password, once the account has been created (See above).
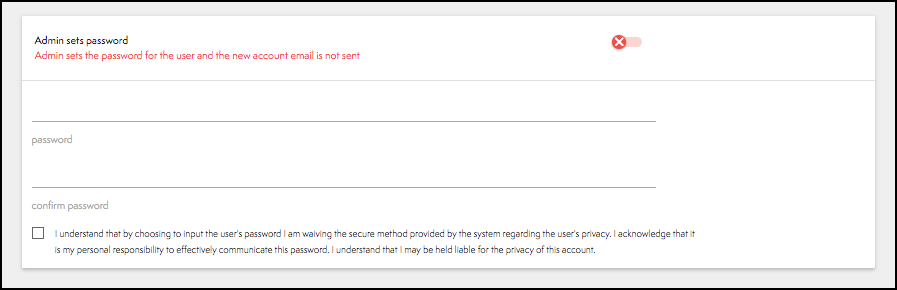
- If the toggle switch is red, the admin will enter the new agent's password. (See below)
- Click Next
- Page two - Assign Products:
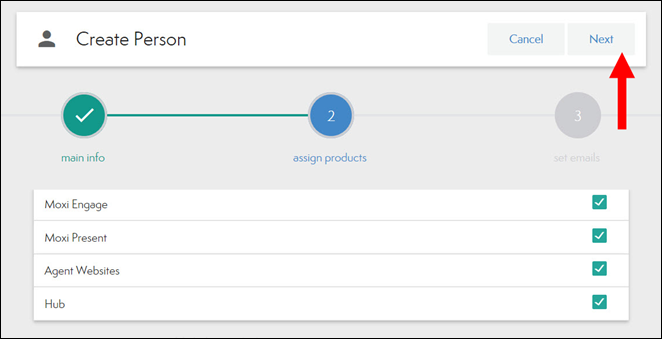
- Select all the products this person should be able to access.
- Click Next
- Page three – Set Emails:
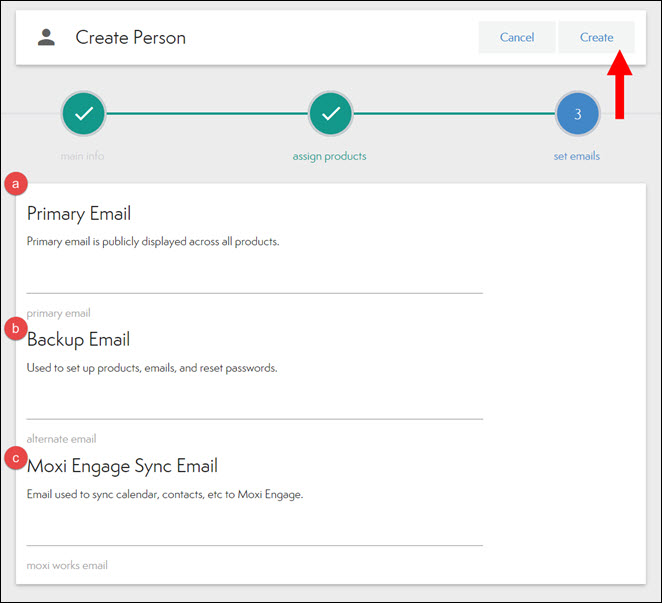
- The Primary email is publicly displayed
- Backup Email must be different from the Primary.
- The Moxi Engage Sync Email can be the same as your Primary.
- Click Create
- Roster-Adding People.pdf300 KB
Comments
0 comments
Article is closed for comments.