Internal pages give you the flexibility to present any type of content you want to the company. They can be used to display information about the community you serve, present market statistics, or simply give users more information about the company.
Creating a custom internal page can be quite simple. Custom pages offer advanced features, such as editing HTML code directly. Users may find it helpful to take basic Website editing classes in order to take advantage of these features.
To begin creating an internal page:
- Click on Internal Page (see above, in the Creating a Top Level Page).
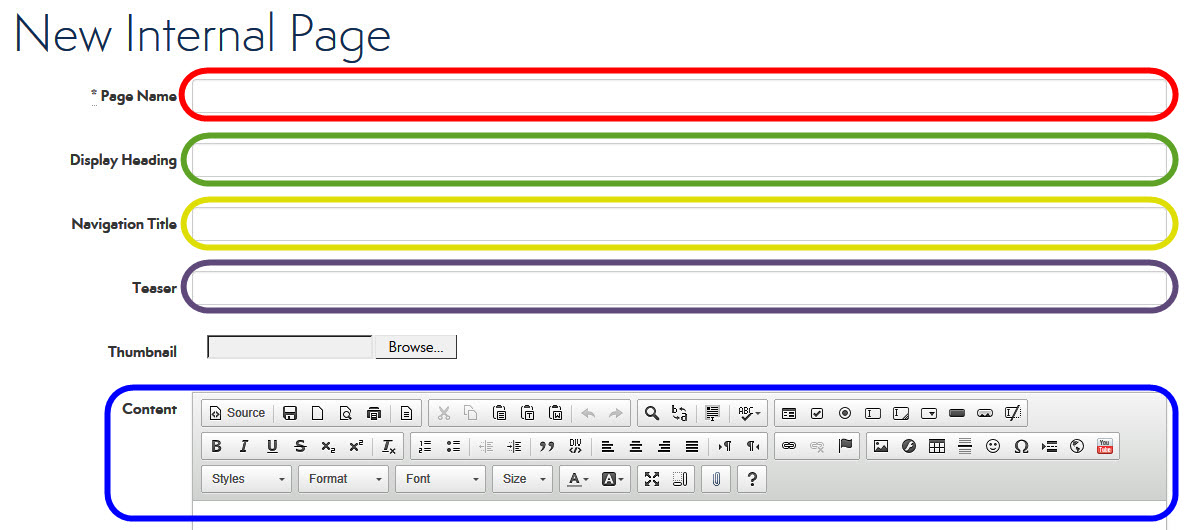
- This will open the content editor (see above, circled in blue), where you can create your page.
- NOTE: Editing or creating a custom page will open the rich text editor, a “What You See is What You Get” (WYSIWYG) content editor that allows you to enter, edit, and format content like you would in a word processor. You do not need a working knowledge of HTML code to create an internal page in this view. This is the default view of the rich text editor. To input HTML directly, select Source.
- NOTE: You can find the function of any button by hovering over it with your mouse. A tooltip will appear, describing the icon’s purpose. The rich text editor allows you to change text style or font alignment, insert bulleted or numbered lists, and more.
- Page Name: On the New Link page, give your page a Page Name (see above, circled in red).
- NOTE: This is a required field and will be the default name displayed on the Intranet Admin.
- Display Heading: This is the title that will show on the individual page (see above, circled in green).
- NOTE: If blank, the Page Name will be used.
- Navigation Title: This name will show in the breadcrumb navigation to this link (see above, circled in yellow).
- NOTE: If blank, the Page Name will be used.
- Teaser: This information can be used to describe the link in a short paragraph (see above, circled in purple).
- Permissions: By default, the permission settings are available to everyone (see below).
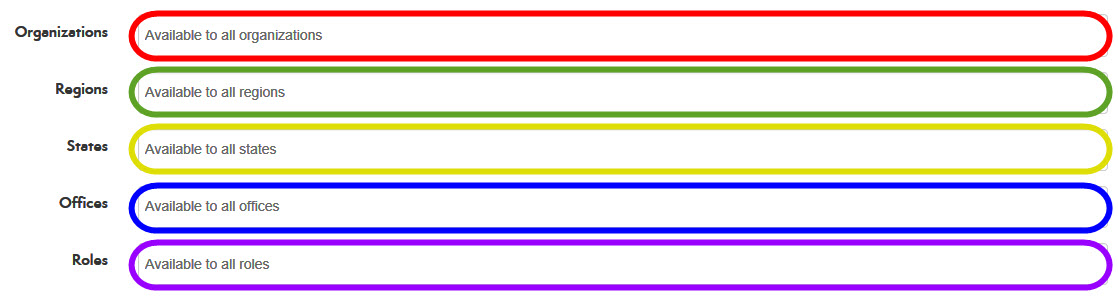
- Organizations: If the information is specific to an organization(s), select them here (see above, circled in red).
- Regions: If the information is specific to a region(s), select them here (see above, circled in green).
- States: If the information is specific to a state(s), select them here (see above, circled in yellow)
- Offices: If the information is specific to an office(s), you can select them here (see above, circled in blue).
- Roles: If the information is specific to a role(s), you can select them here (see above, circled in purple).
- Once you have input all desired content, select whether you want to Hide this page from Mobile Phones or Desktops (see below).

- Select how you would like the page to appear in the navigation (see below).

- Show Title
- Show Teaser
- Show Thumbnail
- Select whether you are ready to Publish (see below).

- Click Create Page.
Comments
0 comments
Article is closed for comments.