The Sales Flow is an all-in-one view of all transactions you are working on at any given time. Each Sales Flow zone is a milestone for an individual client’s progress toward a successful transaction. Each zone includes a task list to help you stay on top of the transaction and keep a steady pipeline for your business. These task lists can be customized by adding or removing any task while you're moving through the transaction. They can also be updated for all future transactions within Engage Settings.
The zones reflect how you work as an agent and are not tied to a listing on the MLS and the tasks will be specific to that segment of the lifecycle of a transaction. Marketing will be where most of your contacts will be placed. Tasks include connecting for coffee, subscribing to a touchpoint, or posting to their social media. The Prospects zone is for those people that have raised their hand and indicated an interest in buying or selling. The Actives zone is for those transactions you are actively working on (staging, finding the photographer, going on buyer tours, listing the property on the MLS, etc...). And the Pending zone is for transactions that have a mutually agreed upon buyer/seller contract and a known close date.
In this article, we're looking at how to access and manage these tasks for all new transactions in Engage Settings.
Task Manager Overview
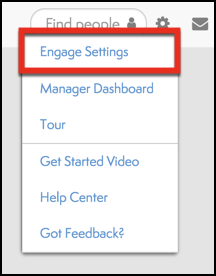
- From the settings drop down menu, select Engage Settings (See below).
- Select Task Manager (See below).
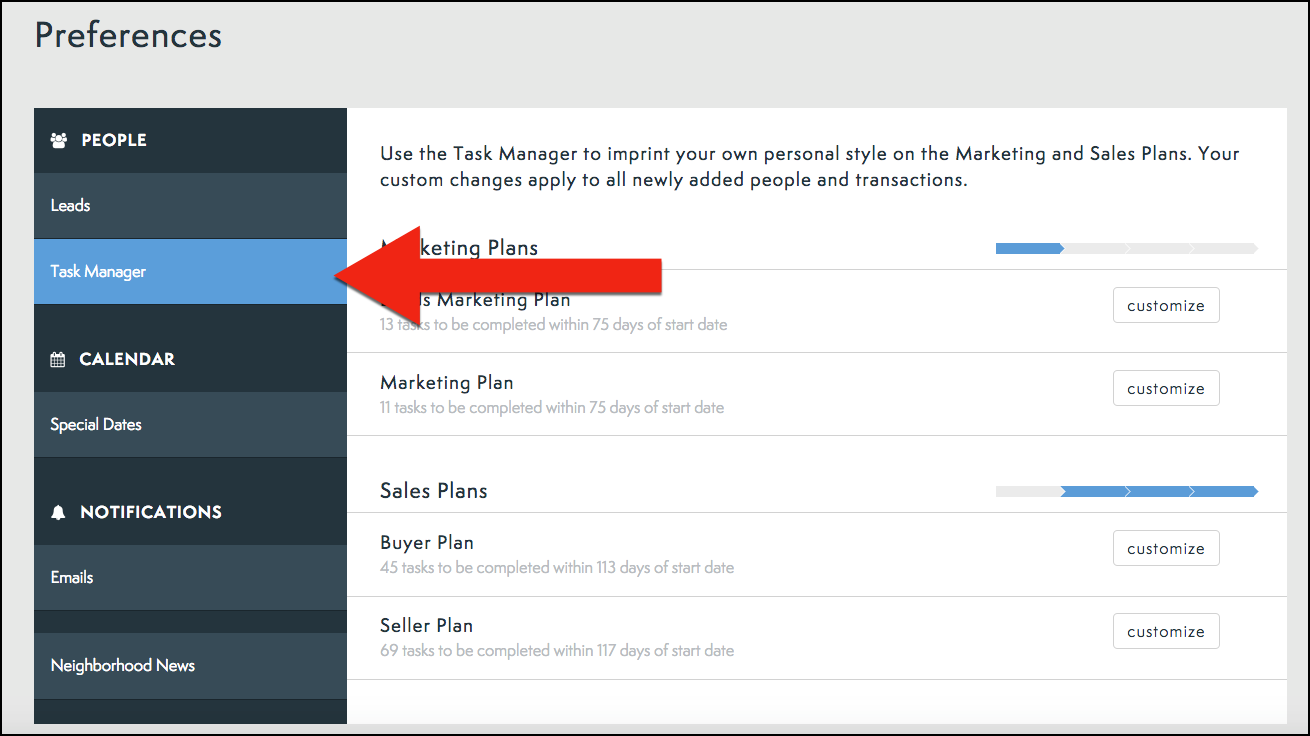
- Task Manager Overview:

a. Lead Marketing Plan – This will create a task list for the leads that come into Engage from either the Neighborhood News sign-up sheet or one of our Lead routing partners!
b.Marketing Plan –This task list will be for the people in your marketing flow that originate from your sphere of influence. These contacts can come from your email or people you put directly into Engage.
c. Buyer Plan –Here you can create task lists for buyer transactions! You will be able to make separate lists for the Prospects, Active, and Pending sections of the sales flow.
d.Seller Plan – You guessed it, the seller list! You can create separate lists for the Prospects, Active, and Pending sections for your seller sales flow.

e. Customize – This button will bring you to the task list for each one of the sections in the sales flow.
Editing Tasks
- Select which part of the plan you would like to edit.
- NOTE: This only applies to Buyer or Seller Plans.
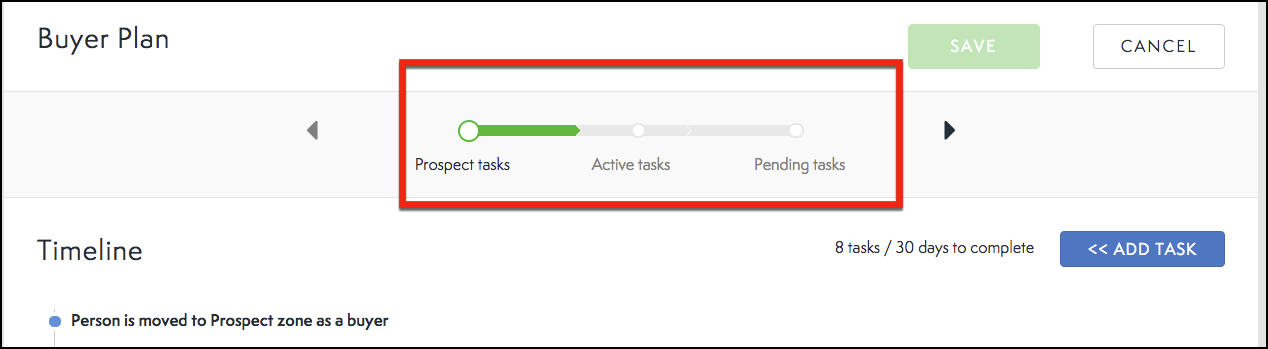
- NOTE: This only applies to Buyer or Seller Plans.
- Select which task you would like to edit.
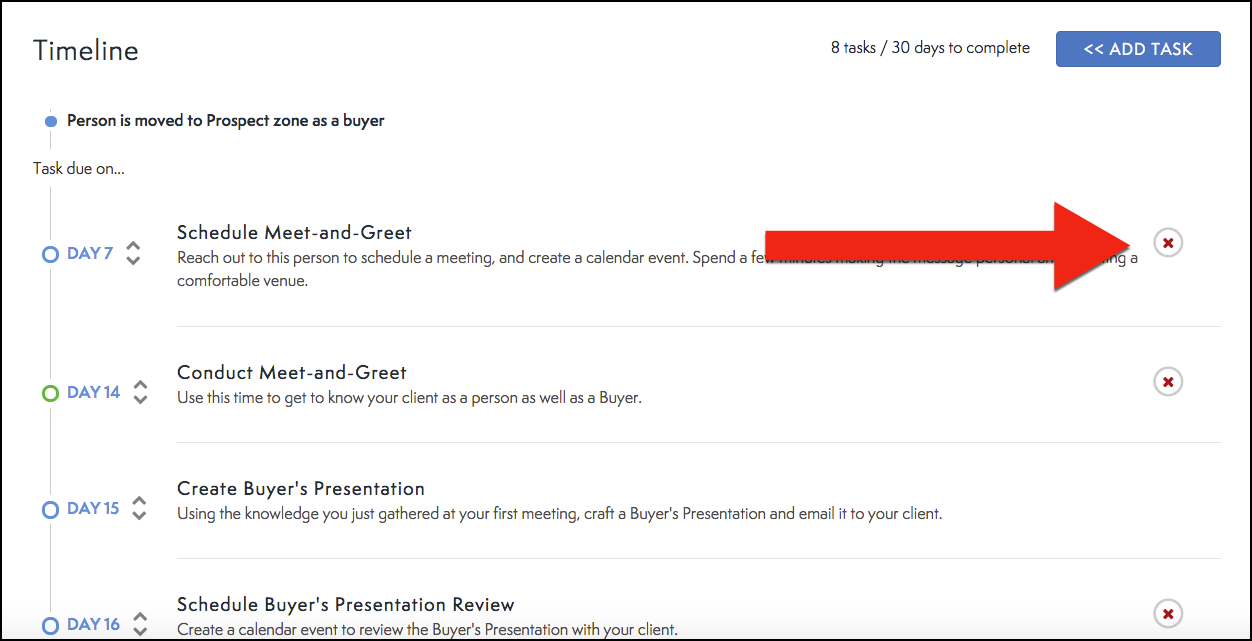
- NOTE: The due dates begin counting the moment you move your person to each section of the sales flow. (I.e. when I move Jillian to the Prospects part of the sales flow, the task “Schedule a meet and greet” will be due 7 days later).
- Select the arrow next to the date.
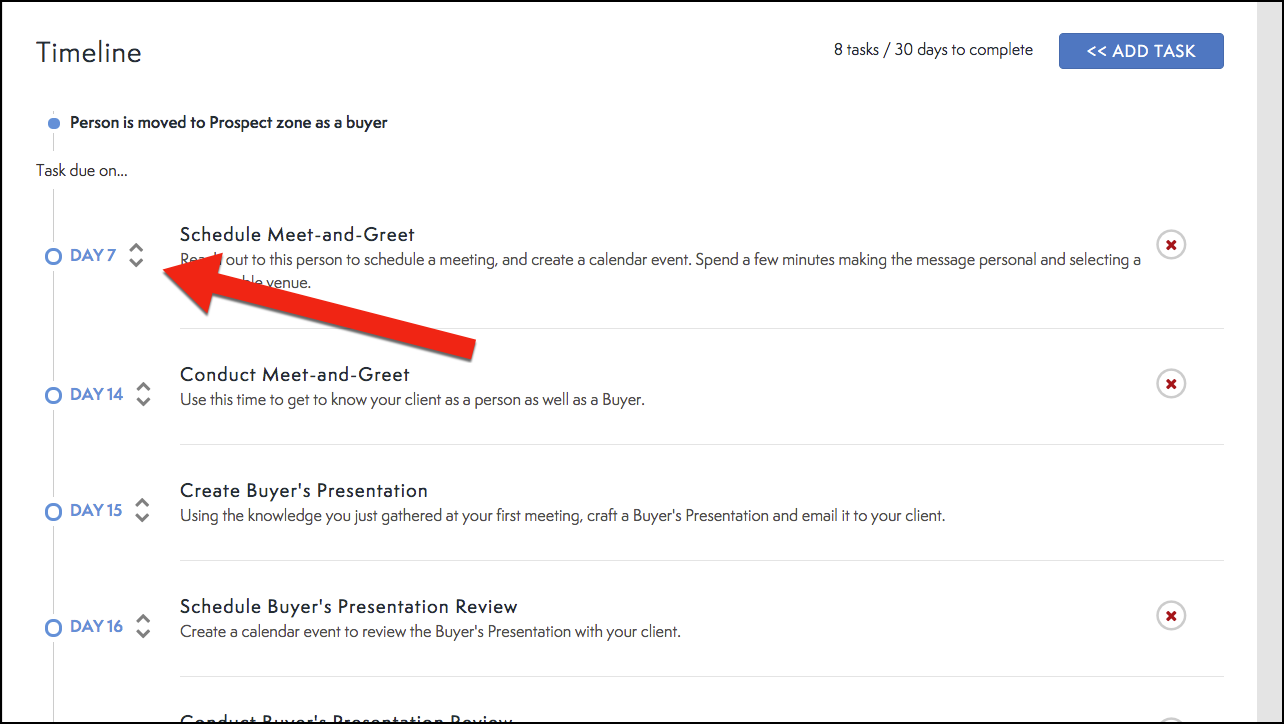
- Set the due day for this task. This will be the total number of days after your contact has entered this zone of the Sales Flow.
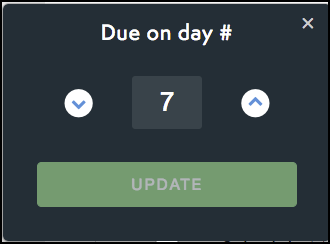
- You can also delete a task by using the red “X” on the right of the tasks.
Adding a New Task
Make your task lists more complete for how you do business by adding a task to any zone.
- Select New Task (See below).

- Select New, to create a new task.

- Fill out details of new task including Name, Description, and Due Date, and select

Add a New Task From the Stock Task List
- Select Add Task (See below).
- Select the Task from the Stock Task list.
- NOTE – You can search for tasks using the search bar. You can also, see the details of the task by clicking on it.

- NOTE – You can search for tasks using the search bar. You can also, see the details of the task by clicking on it.
- Task Manager.pdf300 KB
Comments
0 comments
Please sign in to leave a comment.